侘寂 (Wabi Sabi)

“Simply put, wabi-sabi is the marriage of the Japanese word wabi, meaning humble, and sabi, which connotes beauty in the natural progression of time.” [1]

I remember learning about the Japanese concept of wabi-sabi during my A-level studies. My teacher at the time (Bridget McVey) explained that it is a word for which the individual must make their own definition – that if you were to ask, most Japanese citizens would not define the word. Her definition of the word was one of natural beauty. In relation to ceramics she expressed a ruggedness that allowed the materials used to speak for themselves: rough mark-making and imperfect cuts, glazes allowed to fire unpredictably. During this lesson we had a guest visit – the potter Nigel Cunningham, whose work could be described as wabi-sabi. Under his guidance we created slab-built vases and Japanese tea-bowls that were thrown on the wheel. (See links below for examples of Cunningham’s tea bowls and vases.)

The idea of wabi-sabi ties in well with my project as one of the main influences is nature and one possibility that I would like to portray through my work is noticing the small details of nature. This could be reflected by the way wabi-sabi acknowledges the beauty in the detail of imperfection. This style would also allow me to use fairly traditional forms thus providing an excellent base to work with.


http://nigelcunningham.com/wp-content/uploads/2012/09/P1010077.jpg
http://nigelcunningham.com/wp-content/uploads/2012/09/P1010094-e1348936225633.jpg

References:
1. Front inside Sleeve, Lawrence, R. 2004. The Wabi-Sabi house. New York: Clarkson Potter.

Turning

Today I attempted to turn a pot for the first time. I only had one pot to attempt with and unfortunately it was unsuccessful. I made the common newbie mistake of over-turning the base until it was too thin and so the middle would concave slightly making it impossible to even create a flat smooth base. 

Two things I successfully learnt include tapping the bowl in to the centre and sticking down with clay and tapping the bowl to determine thickness. (I was shown this only after having made the base too thin, so couldn’t utilize this technique to prevent the failure.)

Throwing with porcelain

I have spent the past couple of nights practising throwing with porcelain, a notoriously difficult clay body to throw with. (Porcelain is a very thirsty clay, meaning it both absorbs more water and requires more water when throwing to prevent the hands from catching. It is also more of a plastic clay body than others.) After not throwing anything for about a year, and having had little prior skill this proved challenging, so I spent a while practising just centring the clay, coning up and flattening. After an hour or two of this I attempted to throw some bowls.

My success rate is very inconsistent at this point. For example on the first day (using unknown weights of clay), I failed once, then successfully threw a bowl, following which seemed to keep messing up. Today (Using 1 pound balls of clay) I made several attempts before successfully throwing a bowl, and then continued to fail. I have started to weigh and log the weight of the clay I start with as this will allow me to easier find the right size for different objects.
Common problems I encounter which lead to the failure of a throw is overthrowing and thus introducing too much water to the clay body, accidental knocks that bring the work out of centre, careless knocks of tools leading to collapses.

Today I spent a long time practising throwing cylinders as bowls come more naturally to me, cylinders I find particularly difficult.

Other notes:
-Using a thicker wire to remove the pot from the wheel head will allow more air underneath, thus making the removal easier – particularly if the pot is slightly too wet.
-Wipe away excess clay from wheel head to aid in removal of pot.
-Different motions (eg. straight, Zig-zag or wave-like) with the wire will create different patterns on the base of the pot upon removal. As will different wires. (eg. thick, thin, coarse, smooth etc.)

2013-10-09 13.09.49
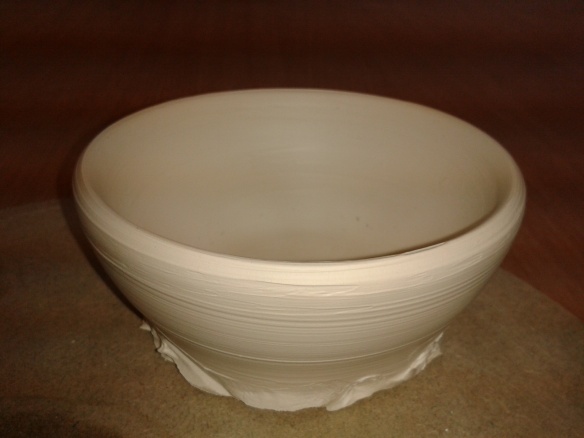
Day 1 bowl: Note untidy base from body being too wet when lifting. 2013-10-09 15.56.02
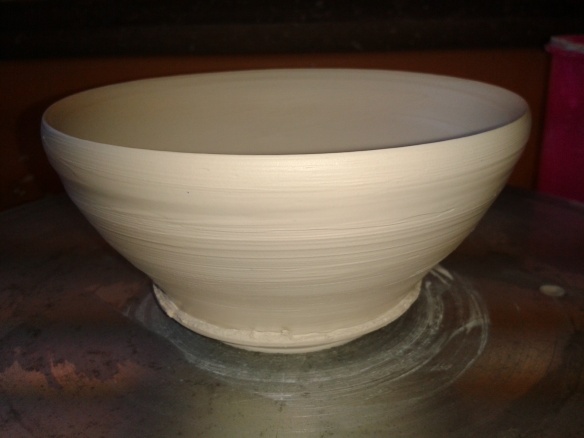
Day 2 bowl: Note deeper undercut making lifting from wheel easier. (This image displays the bowl on the wheel, however this bowl was successfully uploaded. Will insert image on turning post.)

Using balloons to make the base of functional ware.

The past few days I have been experimenting with using balloons as a base for making functional ware. 

1. Pouring slip on top of the balloon in stand: I have found that this method creates layers of slip which could be seen as an abstraction of the shoreline at the sea. This method captures the movement of slip and allows the material self creation that ties in well with the idea of ‘Wabi Sabi’. Alternatively, by pouring the slip on and then touching the clay and moving it around, adding more slip with my hands, I found that it created much harsher movements that were rather interesting. 

2. Dipping the balloon in the slip. This method is fantastic for creating a smooth surface, however it is also prone to allowing air bubbles to appear on the surface. Perhaps agitating the slip prior to dunking could resolve this problem, however it is proving time consuming and loud and I have not yet had the chance to do it for long enough as I do not want to distract my peers working in the same area. 

3. Papier-mâché: Using a almost water thin slip to mimic the effect of papier-mâché, The clay settling to the bottom of the bowl proved not a problem as when applying the strips of paper the water is constantly agitated. In fact, the collection of clay at the bottom of the bowl that appears after a couple of moments of the water being still has provided a great material to apply to the wet work after the layers of paper are applied with the finger tips, and is liquid enough to not produce finger prints or unwanted texture/detract from the texture of the paper underneath. Once fired, a see-through glaze can be applied to act a mimic of a top layer of PVA glue to real papier-mâché, providing extra strength. Another bonus of applying a see-through glaze is that it will make the object waterproof, allowing it to be utilized for drinking/eating. When applied thinner, this method could create beautiful candle holders as the thin porcelain should allow the light to travel through slightly, displaying the layers of paper. 
-Also tried changing consistency of slip to approximately the consistency of cream

Analysis: If the papier-mâché technique is successful after firing, I feel this is a method that links well to my project. Papier-mâché is a sculpting technique that I enjoyed practising as a child so using it now brings a fondness and nostalgia that is quite therapeutic.